How to order
Please send an e-mail to office@tonewoods.info or order by phone +43 3882 24176
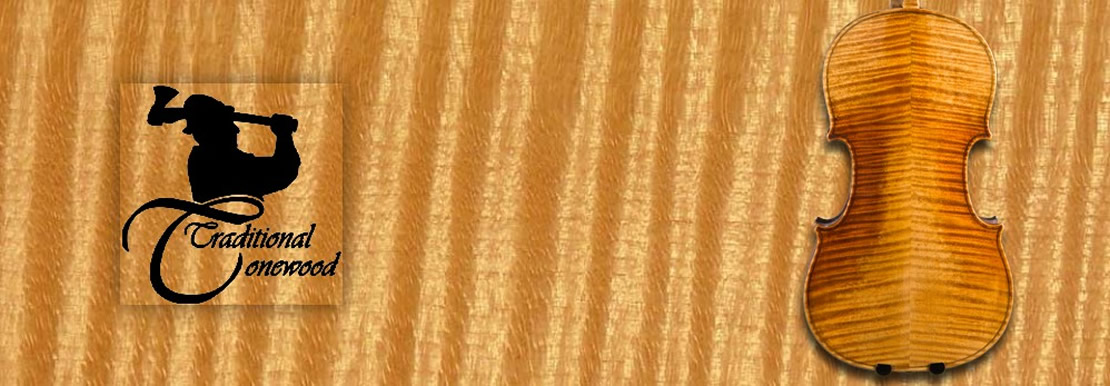
ANTICA VERNICE ITALIANA
Please wear protection when using volatile solubles
Step 1
Finish the surface by use of shaving grass and burnish with a suitable stone (pebble). Stain the wood by use of UV-light and/or colouring with a solution of Curcuma and/or madder root in alcool or turpentine. If the grain rises again, You can burnish again using the stone ( – if You want to create another effect, e.g. on the top, don´t burnish again).
Step 2
Apply a filler: depending on how much weight You want to add, You can choose: Triple – very light, Pumice – medium weight, Volcanic earth – medium weight, glass powder – heavy.
For a violin, take about 3mls of varnish (preferably using a syringe) and put it on a glass or stone plate. Add one third i.e. 1ml of spirits of turpentine or mineral spirits and mix. If You want to mark the pores of the wood You can add pigment to the filler – mix thoroughly.
Put some dry powder on the wood and using a rug soaked with thinned varnish rub the powder in, until You can see a shine on the surface. The amount of varnish and the amount of turpentine used determines the depth the varnish penetrates into the wood. Any excess can be rubbed off with a dry piece of rag.
This step may be repeated after drying if necessary. Drying time in UV-light: some hours.
Step 3
Apply first hand: If the surface is overall shining and the colour of the ground satisfying, a first coloured glaze is applied. For a violin, pour about 4mls of varnish on the glass plate. Add a small amount of pigment (pigment should be very finely ground before mixing into the varnish – artificial pigments usually are already very fine) and start mixing with a stone or glass muller. Be aware that every particle of the pigment should be covered by varnish to achieve maximum transparancy. Add diluent ad libitum to facilitate work. Be aware that – if You work longer – diluent will evaporate.
Apply a very thin coat of varnish, using a stiff brush with fine hair or tap it on with Your fingers (which usually gives a thicker coat and may cause drying problems). Hang to dry in UV light – after about 30 minutes check again wether any dropping has developed. If so, wipe it away wih Your fingers. Do not try to do any retouch at this state, it will be much easier when the varnish is completely dry. Let dry for 24 hours. If You proceed to early, varnish may peel of during smoothening.
If You desire a completely flat surface, smooth the varnish after every layer using abrasive paper grade 1200, hard back preferred.. Use a little cooked linseed oil, remove it as well as possible -small remainders will not do any harm as the varnish also contains some linseed oil.
Some earlier investigations show the presence of powder in the lower varnish layers (“gesso”). If You want to produce this effect, add about 10% of powder (the one You used as a filler) to the first layer.
Step 4
Apply one more coat, using the same procedure as above. If the varnish does not stick (little islands without varnish appear) add some drops of cooked linseed oil. Depending on the amount of colour You like and how much pigment You can manage per layer, two to three colour coats should be sufficient.
To many coats can affect the sound.
Last step
After smoothing again, You can finish in 2 ways:
1.Apply a coat of french polish/Benzoin or better
2. Make a very diluted uncoloured varnish, eg. 2mls of varnish and 2 mls of spirits of turpentine. Apply this varnish with a brush, working very quickly and evenly. After this last coat no more finish will be necessary.
Allow to dry for at least two weeks
Downloads: